


-
Learn
-
Scan
-
Practice
-
Track
-
Study
-
Apply
-
Integrate
Interactive Ultrasound Courses
Explore SonoSim's library of 80+ on-demand ultrasound courses. Created by top experts, our interactive and multimedia courses combine regional anatomy, sonographic insight, practical imaging techniques, real patient cases, and helpful videos. Get engaged with our blend of learning tools, all eligible for CME!*
Hands-On Virtual Ultrasound Scanning
Unlock hands-on ultrasound experience with the SonoSimulator®. This proven methodology breaks down the traditional barriers to ultrasound learning, offering access to thousands of real patient scanning opportunities of pathologic conditions.
For beginners and practicing physicians alike, our software provides on-demand, AI-driven performance assessments, guided probe positioning, and immediate feedback. Learn to acquire and interpret ultrasound images on a laptop, with support from a virtual tutor, right at your fingertips.
Risk-Free Practice of Ultrasound-Guided Procedures
Real-time ultrasound guidance for procedures like peripheral IV access is rapidly becoming the standard of care, demanding not only significant knowledge but also refined psychomotor skills.
SonoSim's training environment offers learners a safe and convenient space to hone these essential abilities. With unrestricted access to deliberate practice, SonoSim users can build the knowledge, skill, and confidence needed for success in ultrasound-guided procedures.
Track & Assess Progress
SonoSim revolutionizes learner assessment by offering comprehensive tools to monitor progress, deliver feedback, and even automate ultrasound image review. These features combine to alleviate the most time-consuming parts of managing ultrasound programs, allowing for more focused and effective training. And for learners, this feature provides access to ultrasound image portfolios which are useful for job and internship applications.
Build & Hone Knowledge with Study Tools & Resources
Now, more accessible than ever, learners can review and study ultrasound on-the-go. With case-based learning in our SonoSim QuestionBank, ultrasound case studies become powerful tools to test and reinforce knowledge. Plus, we offer an SPI exam study guide and ultrasound physics review questions, catering to learners of all backgrounds and needs. Our Challenge Cases give learners quick cases to challenge their skills. And a mobile app provides key references on any device.
Bring Ultrasound Simulation to Life
SonoSim LiveScan® offers an immersive, versatile tool for teaching & evaluating the integration of ultrasound into medical decision-making. Whether used with live volunteers or existing manikins, SonoSim LiveScan seamlessly incorporates ultrasound into scenario-based medical simulations, providing more realistic and enriching learning experiences.
Integrate SonoSim into Your Curriculum
We work closely with you to construct a thriving ultrasound training program tailored to your organization's needs. SonoSim's all-encompassing approach, featuring tools, expert guidance, resources, and support, ensures a smooth incorporation of ultrasound education into your existing curriculum. By empowering both educators and learners, our ecosystem unlocks the full potential of ultrasound, providing a pathway to success.


_nsp.jpg?width=225&height=225&name=clinical_dvt_product%20(1)_nsp.jpg)

-
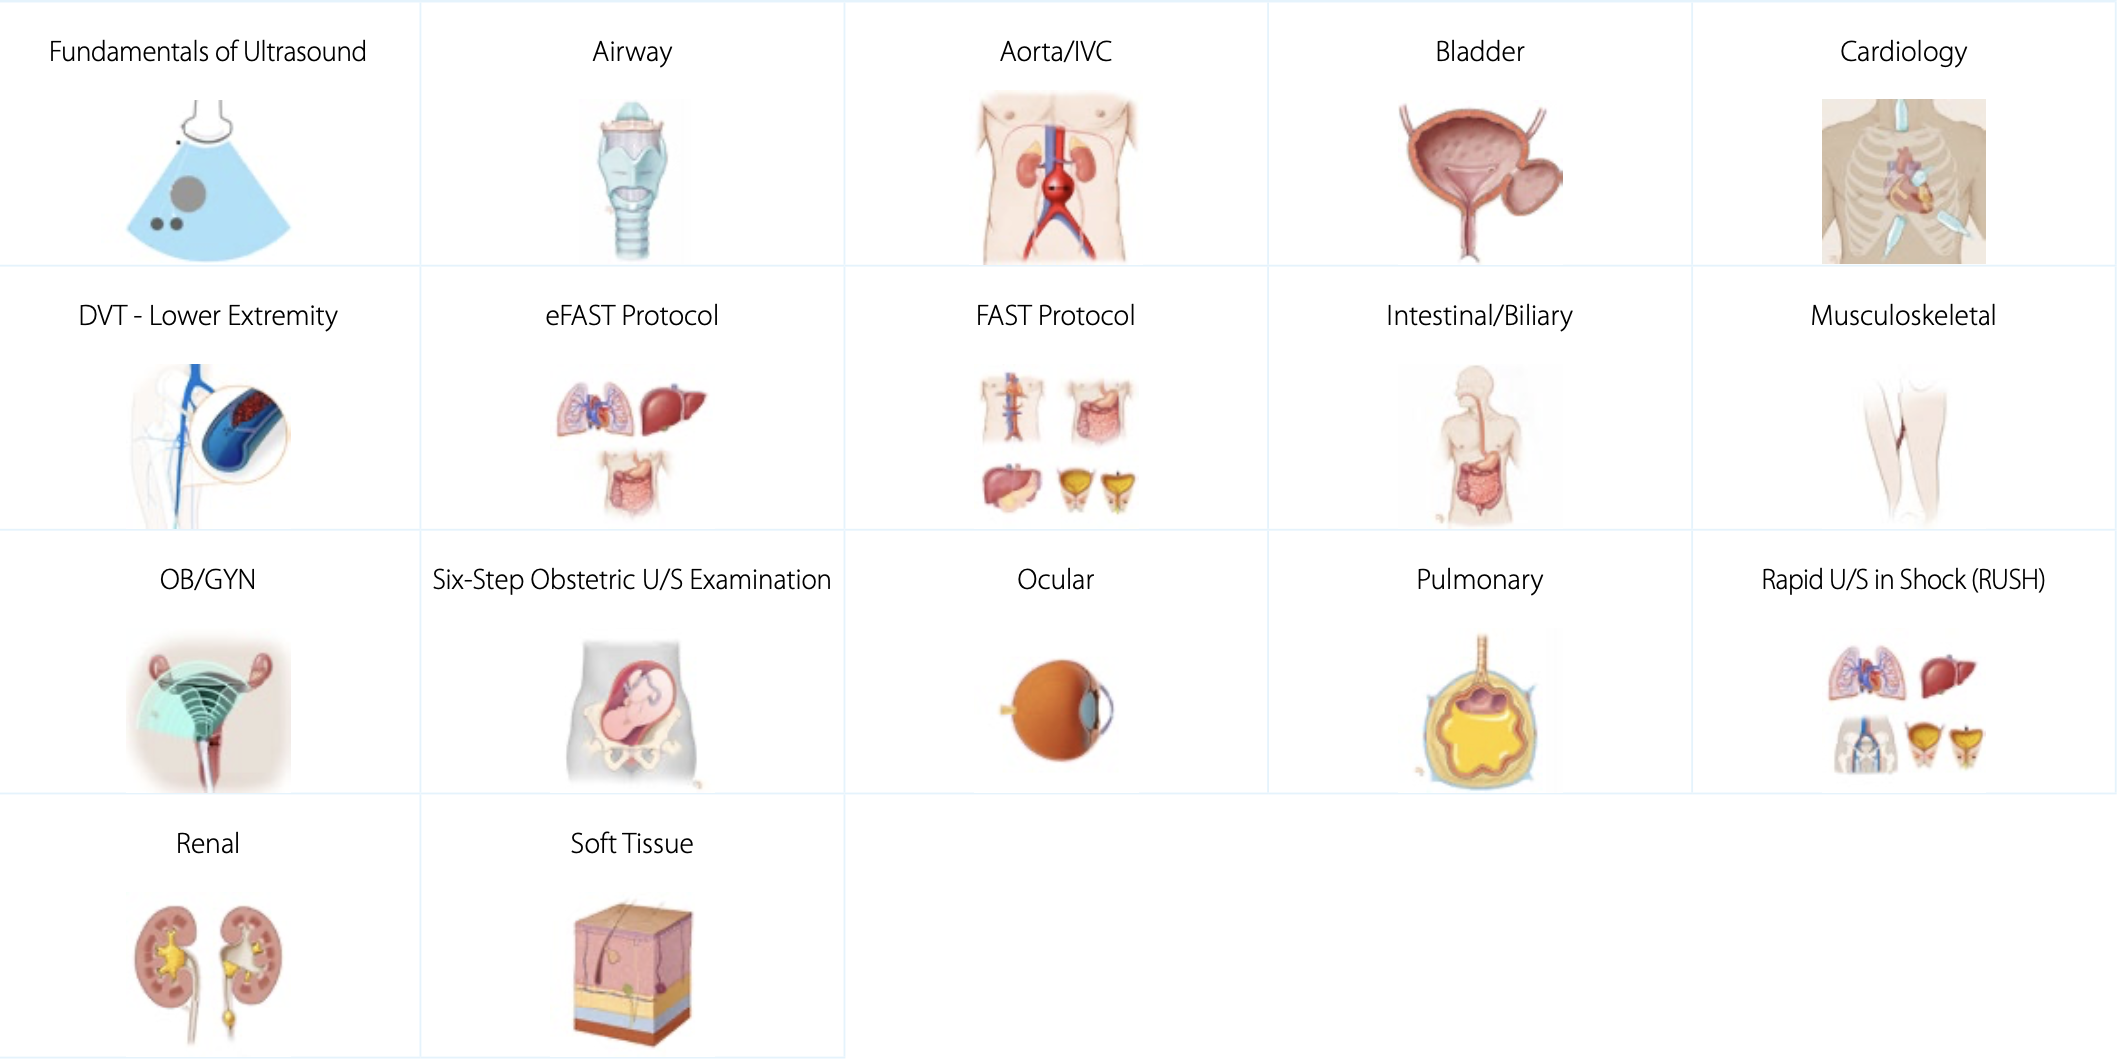
Anatomy & Physiology
-
Core Clinical
-
Advanced Clinical
-
U/S-Guided Procedures
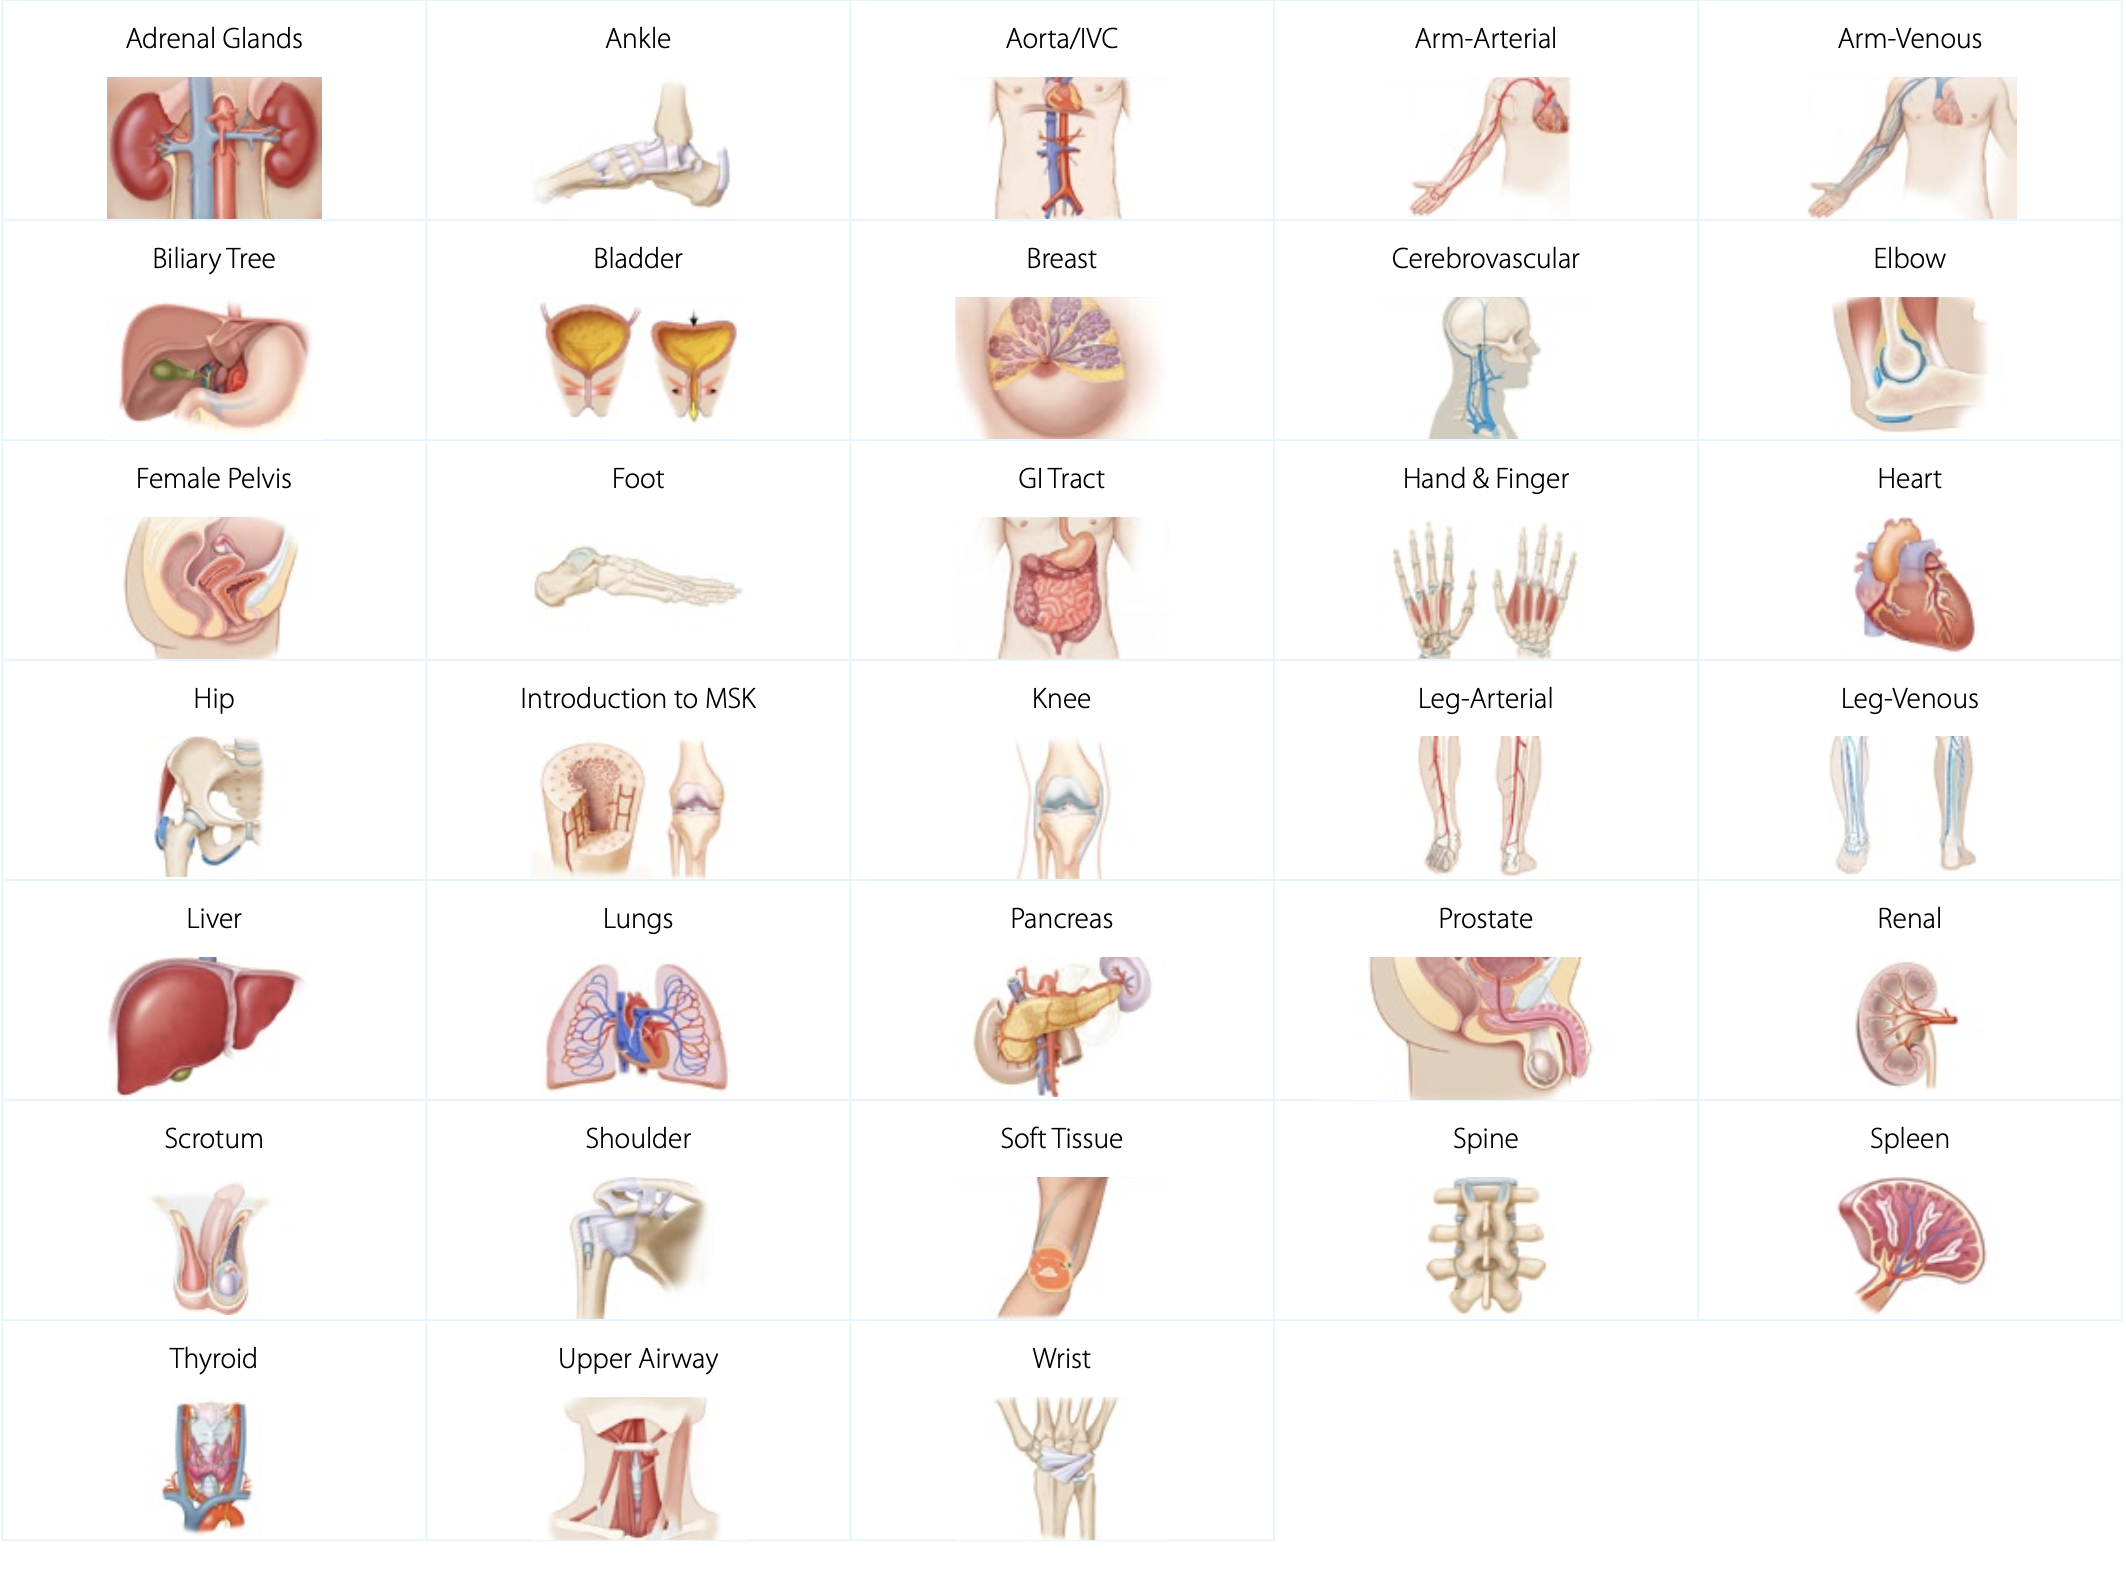
Anatomy & Physiology
SonoSim Anatomy & Physiology topics provide a strong foundation of ultrasound knowledge, specific to anatomical regions, organs, and structures. Developed by ultrasound experts, SonoSim training covers regional anatomy & physiology, sonographic anatomy, scanning techniques, and imaging tips & pitfalls. Each topic comes with several scanning cases that are accessed in the SonoSimulator to reinforce learning from the courses with hands-on scanning on real patient ultrasound imagery.
Core Clinical Ultrasound Courses
Our Core Clinical Ultrasound Courses provide an in-depth understanding of the components required to accurately assess and diagnose using ultrasound. Exam indications, regional anatomy, sonographic anatomy, and sonographic technique are covered. There is a focus on pathologic case studies and imaging tips & pitfalls. These courses are ideally suited to prepare your point-of-care ultrasound (POCUS) learners for simulation scenarios.
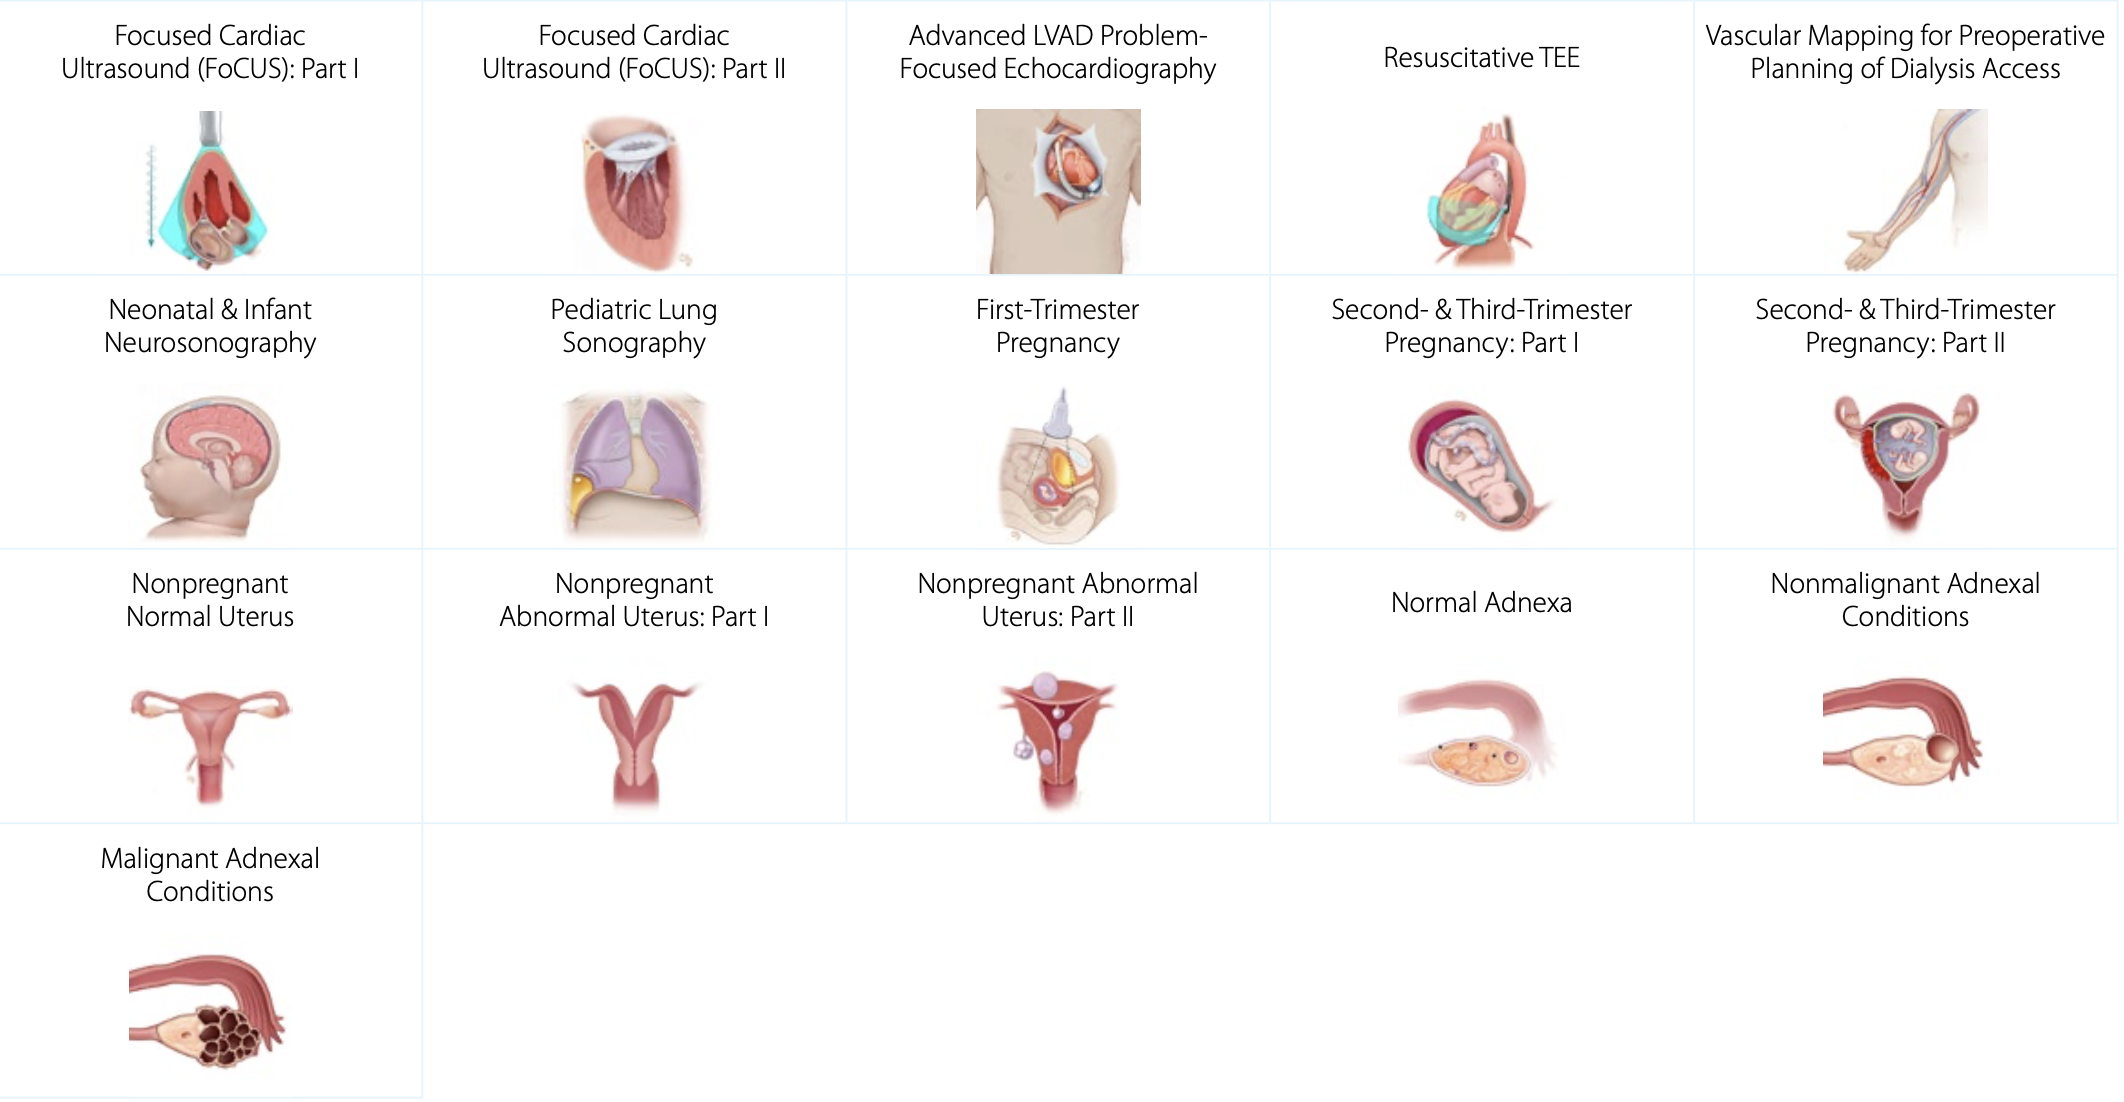
Advanced Clinical Ultrasound Courses
SonoSim Advanced Clinical Ultrasound Courses cover complex diagnoses and sonographic applications. With a focus on specific pathologic conditions, these advanced clinical and diagnostic ultrasound topics provide learners with a deep understanding of ultrasound techniques for evaluating various complex medical conditions.
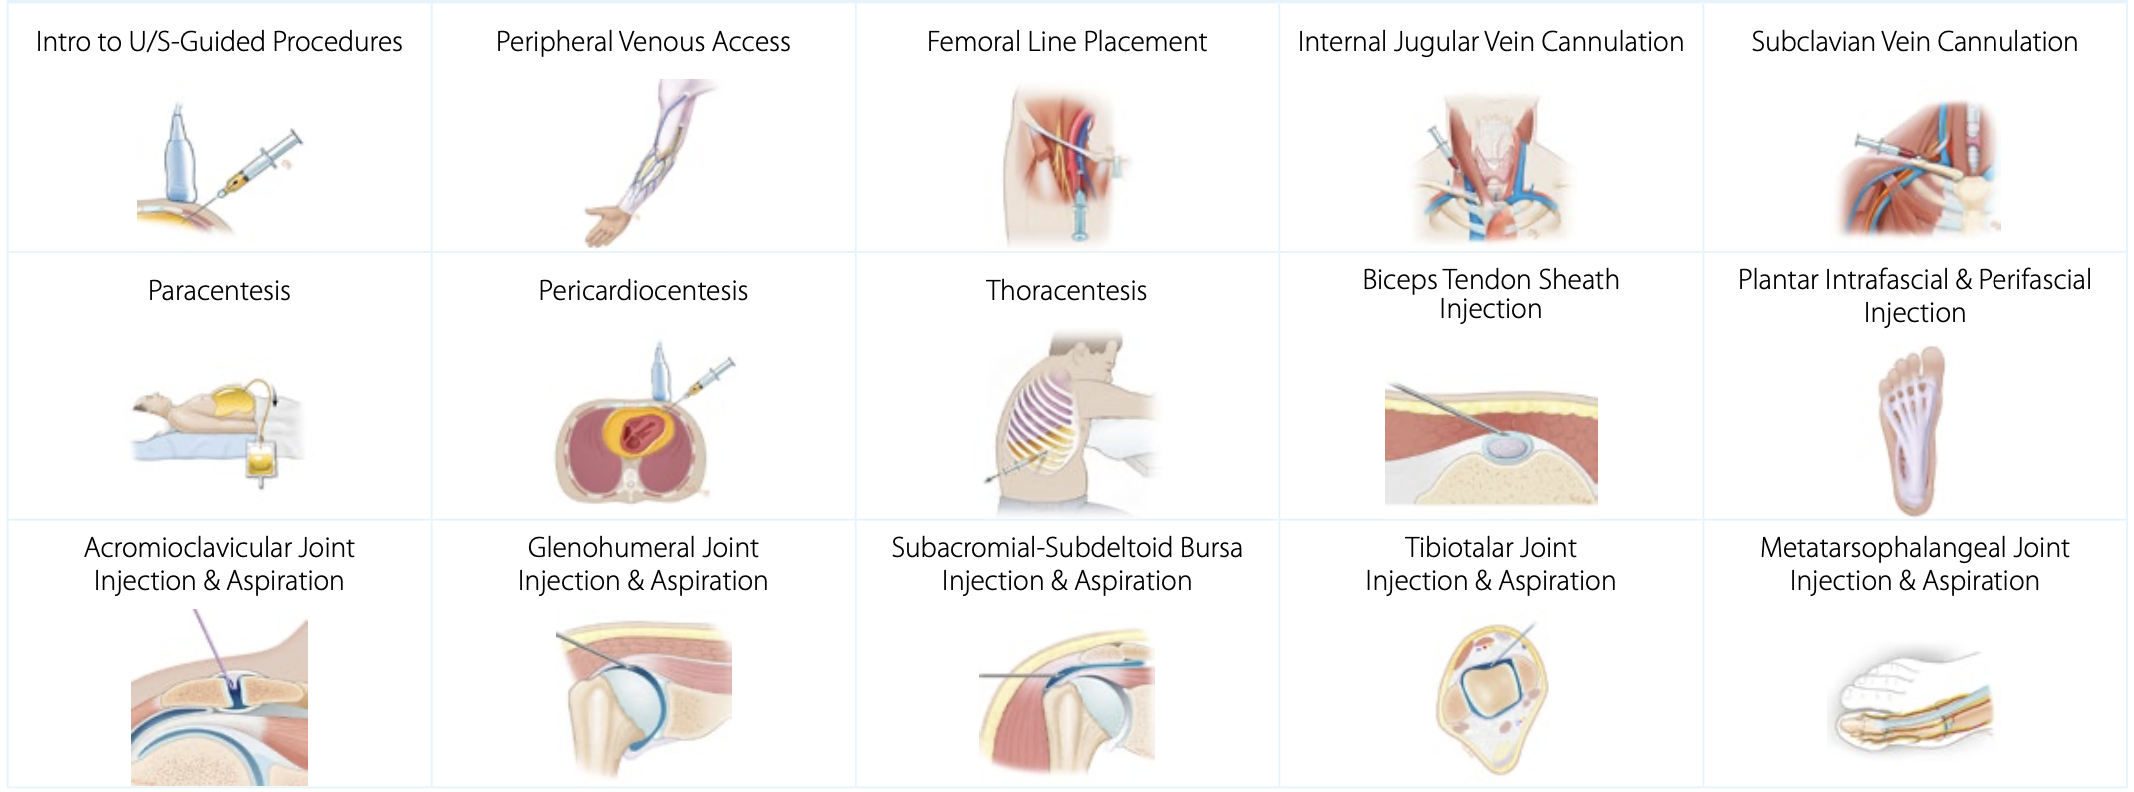
Ultrasound-Guided Procedure Courses
SonoSim ultrasound-guided procedure courses cover patient positioning, procedural steps, imaging adjuncts, potential complications, and more. Using real patient data sets that vary in body morphology, right versus left-sided approaches, and pathophysiologic states, SonoSim helps prepare learners for in-person Sim Center sessions using phantoms and ultrasound machines.
-
Critical Care
-
Emergency Medicine
-
Family Medicine
-
Internal Medicine
-
OB/GYN


